News (click to select category)
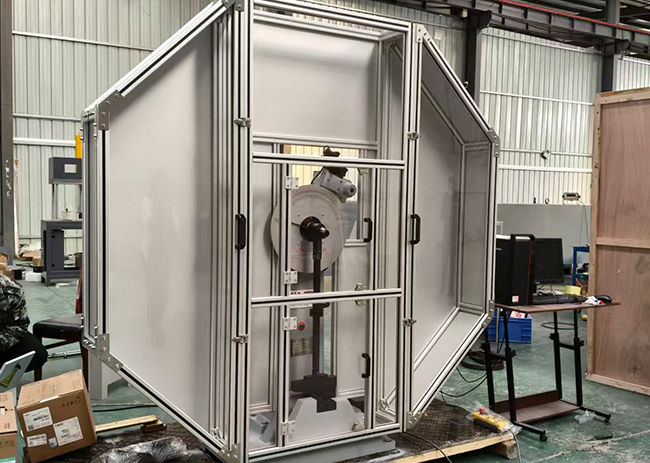
JBW-450D Pendulum Impact Testing Machine - Operating Procedures
Date:2025-12-12ID: 272Heat:
Preparation before installation:
1. Strictly follow the drawings to lay the foundation.
2. Remove the packaging box, remove the four anchor bolts that secure the equipment, bury them underground, expose the screw part, and fix the impact machine.
3. Place the square at the bottom right corner of the equipment base horizontally, adjust the level of the equipment, and check if the protective net is installed and fixed properly.
4. Find a professional electrician to open the back cover of the equipment, and connect the three four wire 380V live and neutral wires at the bottom of the wiring block of the equipment, and the neutral wire must be connected!!!
5. Adjust the span between the jaws according to the diagram in the product manual using a span template.
6. Click to take the swing. Normally, it should be taken counterclockwise. If it is found to be taken clockwise, immediately cut off the power and switch the order of the three live wires randomly. (The screen impact machine normally swings the screen and the display angle is negative)
Common troubleshooting:
1. The device does not swing: the neutral wire is not connected or the motor is burnt (find an electrician to measure the motor)
2. Abnormal sales: Immediately turn off the power (disconnect the power switch on the manual control box or turn off the main power)
If the safety pin of the device is found to pop out abnormally, the power should be cut off immediately. If the swing continues without power, it will burn out the motor!!! After power failure, turn on the power again to troubleshoot:
(1) Turn off the power and push the safety pin behind with your hand. If it cannot be smoothly pushed out, it means that there are impurities or rust around the safety pin that are stuck. Push it out vigorously and repeat the push a few times to use it normally.
(2) Gently touch the cylindrical proximity switch in the upper left corner of the device with a screwdriver. When touched, the safety pin moves, indicating a change in the distance between the proximity switch. Turn the proximity switch to adjust the distance and adjust it to 1 millimeter from the accessory pushed out by the hammer hook in the upper left corner of the machine.
If you find that there is no signal between the device and the host, check if the data cable connecting the computer and PLC is not connected!
When taking out the swing, there is a clicking sound of the hammer and it often slips off. When releasing the swing, the same situation occurs, which is that the clutch is broken and needs to be replaced.
If there are no issues with the above, it can be used normally.
Preparation before operation
1. Equipment inspection: Check that the power supply and wiring are intact and undamaged, the pendulum, anvil, and splash guard are securely installed, and the impact blade is not damaged; The microcomputer system, display screen, and data acquisition module are normal, and the emergency stop button and safety interlock are sensitive and effective.
2. Sample preparation: Select qualified Charpy impact samples according to GB/T 229 standard, clean the surface oil stains and burrs, confirm that the notch type (V/U type) and size meet the test requirements, and there is no deformation or crack.
3. Parameter confirmation: Based on the material and specifications of the sample, preset the test parameters (sample size, notch type, pendulum energy), calibrate the zero point and energy indication of the equipment, and ensure that the accuracy meets the standard.
4. Personal protection: There are no unrelated personnel in the operating area, and the protective cover is intact and closed.
Usage steps:
1. Turn on the power switch and manually close the power switch;
2. Choose an energy hammer;
3. Set the pointer to zero;
4. Turn the pointer of the dial to the 300J position and click the swing button until the hammer is raised to the maximum elevation angle, and the safety pin will automatically pop up;
5. Place the sample, use a centering hammer to center the sample, then click on the return pin, click on the impact to break the sample;
6. If there are other samples, repeat steps 4 and 5 until all samples are completed;
7. Click on the return button, hold down the swing button when the hammer is placed in the jaw position, and release the swing button;
8. The experiment is completed.
Shutdown and Cleaning
1.After the experiment is completed, operate the pendulum to return to its initial position, close the test control software, turn off the power supply of the microcomputer and the testing machine host in sequence, and unplug the power cord.
2. Cleaning equipment: Use a dust-free cloth to wipe the blade edge, anvil seat, and workbench of the pendulum, remove sample debris, and apply a small amount of rust proof oil to the blade edge; Clean the fracture samples and store them by category.
3. Equipment maintenance: Check the wear of the pendulum and anvil, and replace them promptly if the blade is damaged; Cover the dust cover and fill in the equipment operation and test records (sample information, test data, equipment status).
Precautions
1.When the splash guard is not closed, the equipment cannot be started. It is strictly prohibited to forcefully disassemble the safety interlock. During the test, it is forbidden to approach the equipment movement area. In emergency situations, press the emergency stop button.
2. After the pendulum is lifted, it is forbidden to reach into the testing area, and it is forbidden to adjust the energy level and anvil spacing of the pendulum without authorization to avoid equipment damage or personnel injury.
3. The sample must be securely clamped, and samples with mismatched dimensions or cracks are prohibited from testing to prevent splashing and injury during impact.
4.When the equipment runs abnormally (abnormal noise, inaccurate data, or stuck pendulum), immediately stop the machine and cut off the power, contact professional personnel for maintenance, and prohibit disassembling core components by oneself.
5. Regularly calibrate equipment energy readings and anvil spacing to ensure compliance with national standards and extend equipment lifespan.
About LiLing
Product range
News
Contact LiLing
National Service Hotline:+8618660398828
Address:山东省济南市市中区魏华西路6号院内2号厂房


Business consultation (WeChat)
Technical Support: ChaoYueHuLian
Links: